University of Hawaii at Manoa Food Choices
Grub ‘n’ Go is a Meteor application allowing users a convenient way to see available dining options/menus on campus. Our main goal is to help students go out and enjoy foods that they want to eat, giving information about vendors and what they sell.
Anyone with a UH account can login to Grub ‘n’ Go by clicking on the login button. The UH CAS authentication screen then appears and requests your UH account and password.
Once authenticated, you can create a profile that provides a biographical statement and list of interests, plus links to selected social media sites (GitHub, FaceBook, Instagram):
After creating a profile, you will be listed on the public directory page:
Grub ‘n’ Go also provides a filter page, available to those who can login to the system with their UH account. The filter page allows you to display all portfolios with a given interest:
Landing User will first see the landing page, giving them a quick sense of what GrubNGo is about. A map will also be displayed which gives the user a sense of where all the food options are located.
Vendors List The vendors list is the complete list of food establishments on UH Manoa. Here, users can also filter food choices to best suit their current cravings.
There are two types of users: Users and Vendors. If User: Register/Login Users can either register if this is their first time and login if they have an existing account. Although a user can use the site regardless if they have an account or not, there are benefits for creating an account such as: liking favorite menu items and having a daily feed. To create an account, all the user must input is their email and create a password.
User Homepage Once the user logs in, they’ll be redirected to their homepage, which showcases their favorite locations and a feed displaying if their favorite dish is being served today.
If Vendor: Register/Login Along with their email and password, vendors are required to input more information. Vendors will also input their name, location (on campus), hours, food category/tags, and with the option to write down their personal site.
Vendor Homepage Once the vendor logs in, they’ll be redirected to their homepage. It’ll display a list of their menu items categorized by food/drinks/other with the option to edit. Editing will allow them to add/remove an item from their list and mark an option sold out.
Download Meteor for your specific platform.
Download a copy of GrubNGo, or clone it from GitHub with the button above.
Open your command terminal, change your directory path to the GrubNGo/app destination. Install meteor with the following command:
$ meteor npm install
After installation completes, enter the following to run the application.
$ meteor npm run start
Open your internet browser, enter http://localhost:3000 into the address bar and press enter. Your browser should show the application running locally on your computer.
Directory structure
The top-level directory structure contains:
app/        # holds the Meteor application sources
config/     # holds configuration files, such as settings.development.json
.gitignore  # don't commit IntelliJ project files, node_modules, and settings.production.json
The separation of the actual meteor app and the config files, .json, and .ignore allow for better project management and avoid excess clutter. Consolidation of all files in a single directory is not advised for directory readability.
Import conventions
This system adheres to the Meteor 1.4 guideline of putting all application code in the imports/ directory, and using client/main.js and server/main.js to import the code appropriate for the client and server in an appropriate order.
This system accomplishes client and server-side importing in a different manner than most Meteor sample applications. In this system, every imports/ subdirectory containing any Javascript or HTML files has a top-level index.js file that is responsible for importing all files in its associated directory.
Then, client/main.js and server/main.js are responsible for importing all the directories containing code they need. For example, here is the contents of client/main.js:
import '/imports/startup/client';
import '/imports/ui/components/form-controls';
import '/imports/ui/components/directory';
import '/imports/ui/components/user';
import '/imports/ui/components/landing';
import '/imports/ui/layouts/directory';
import '/imports/ui/layouts/landing';
import '/imports/ui/layouts/shared';
import '/imports/ui/layouts/user';
import '/imports/ui/pages/directory';
import '/imports/ui/pages/filter';
import '/imports/ui/pages/vendor';
import '/imports/ui/pages/landing';
import '/imports/ui/pages/user';
import '/imports/ui/stylesheets/style.css';
import '/imports/api/base';
import '/imports/api/profile';
import '/imports/api/taste';
import '/imports/api/munchie';
import '/imports/api/vendor';
import '/imports/api/review';
Apart from the last line that imports style.css directly, the other lines all invoke the index.js file in the specified directory.
We use this approach to make it more simple to understand what code is loaded and in what order, and to simplify debugging when some code or templates do not appear to be loaded. In our approach, there are only two places to look for top-level imports: the main.js files in client/ and server/, and the index.js files in import subdirectories.
Note that this two-level import structure ensures that all code and templates are loaded, but does not ensure that the symbols needed in a given file are accessible. So, for example, a symbol bound to a collection still needs to be imported into any file that references it.
Naming conventions
This system adopts the following naming conventions:
CSS
The application uses the Semantic UI CSS framework. To learn more about the Semantic UI theme integration with Meteor, see Semantic-UI-Meteor.
The Semantic UI theme files are located in app/client/lib/semantic-ui directory. Because they are located in the client/ directory and not the imports/ directory, they do not need to be explicitly imported to be loaded. (Meteor automatically loads all files into the client that are located in the client/ directory).
Note that the user pages contain a menu fixed to the top of the page, and thus the body element needs to have padding attached to it. However, the landing page does not have a menu, and thus no padding should be attached to the body element on that page. To accomplish this, the router uses “triggers” to add an remove the appropriate classes from the body element when a page is visited and then left by the user.
Authentication
When the application is run, the CAS configuration information must be present in a configuration file such as config/settings.development.json.
Anyone with a UH account can login and use Grub n’ Go to create a profile. A profile document is created for them if none already exists for that username.
Authorization
The landing is public; anyone can access this page.
The profile and filter pages require authorization: you must be logged in (i.e. authenticated) through the UH test CAS server, and the authenticated username returned by CAS must match the username specified in the URL.
To prevent people from accessing pages they are not authorized to visit, template-based authorization is used following the recommendations in [Implementing Auth Logic and Permissions]https://kadira.io/academy/meteor-routing-guide/content/implementing-auth-logic-and-permissions).
The application implements template-based authorization using an If_Authorized template, defined in If_Authorized.html and If_Authorized.js.
Configuration
The config directory is intended to hold settings files. The repository contains one file: config/settings.development.json
The .gitignore file prevents a file named settings.production.json from being committed to the repository. So, if you are deploying the application, you can put settings in a file named settings.production.json and it will not be committed.
Grub n’ Go checks on startup to see if it has an empty database in initialize-database.js, and if so, loads the file specified in the configuration file, such as settings.development.json. For development purposes, a sample initialization for this database is in initial-collection-data.json.
Quality Assurance
ESLint
Grub n’ Go includes a .eslintrc file to define the coding style adhered to in this application. You can invoke ESLint from the command line as follows:
meteor npm run lint
ESLint should run without generating any errors.
It’s significantly easier to do development with ESLint integrated directly into your IDE (such as IntelliJ).
Milestone 1: Mockup development
This milestone started on April 2nd, 2018 and ended on April 12th, 2018.
The goal of Milestone 1 was to create the functional requirements for our application which includes: having our system deployed to Galaxy, have a landing page (with a login) and mockups of at least four other pages. Additionally there are software engineering requirements that includes using GitHub issues and a GitHub project called “M1” and practicing Issue Driven Project Management strategies. Lastly, there are home page requirements for our project’s github home page. This includes (but not limited to): a link to the Github organization of this project, up-to-date screenshots, link to the running deployment of our system on Galaxy, link to the M1 project page and a link to the M2 project page.
Mockups for the following four pages were developed and then implemented during M1:
Mockup 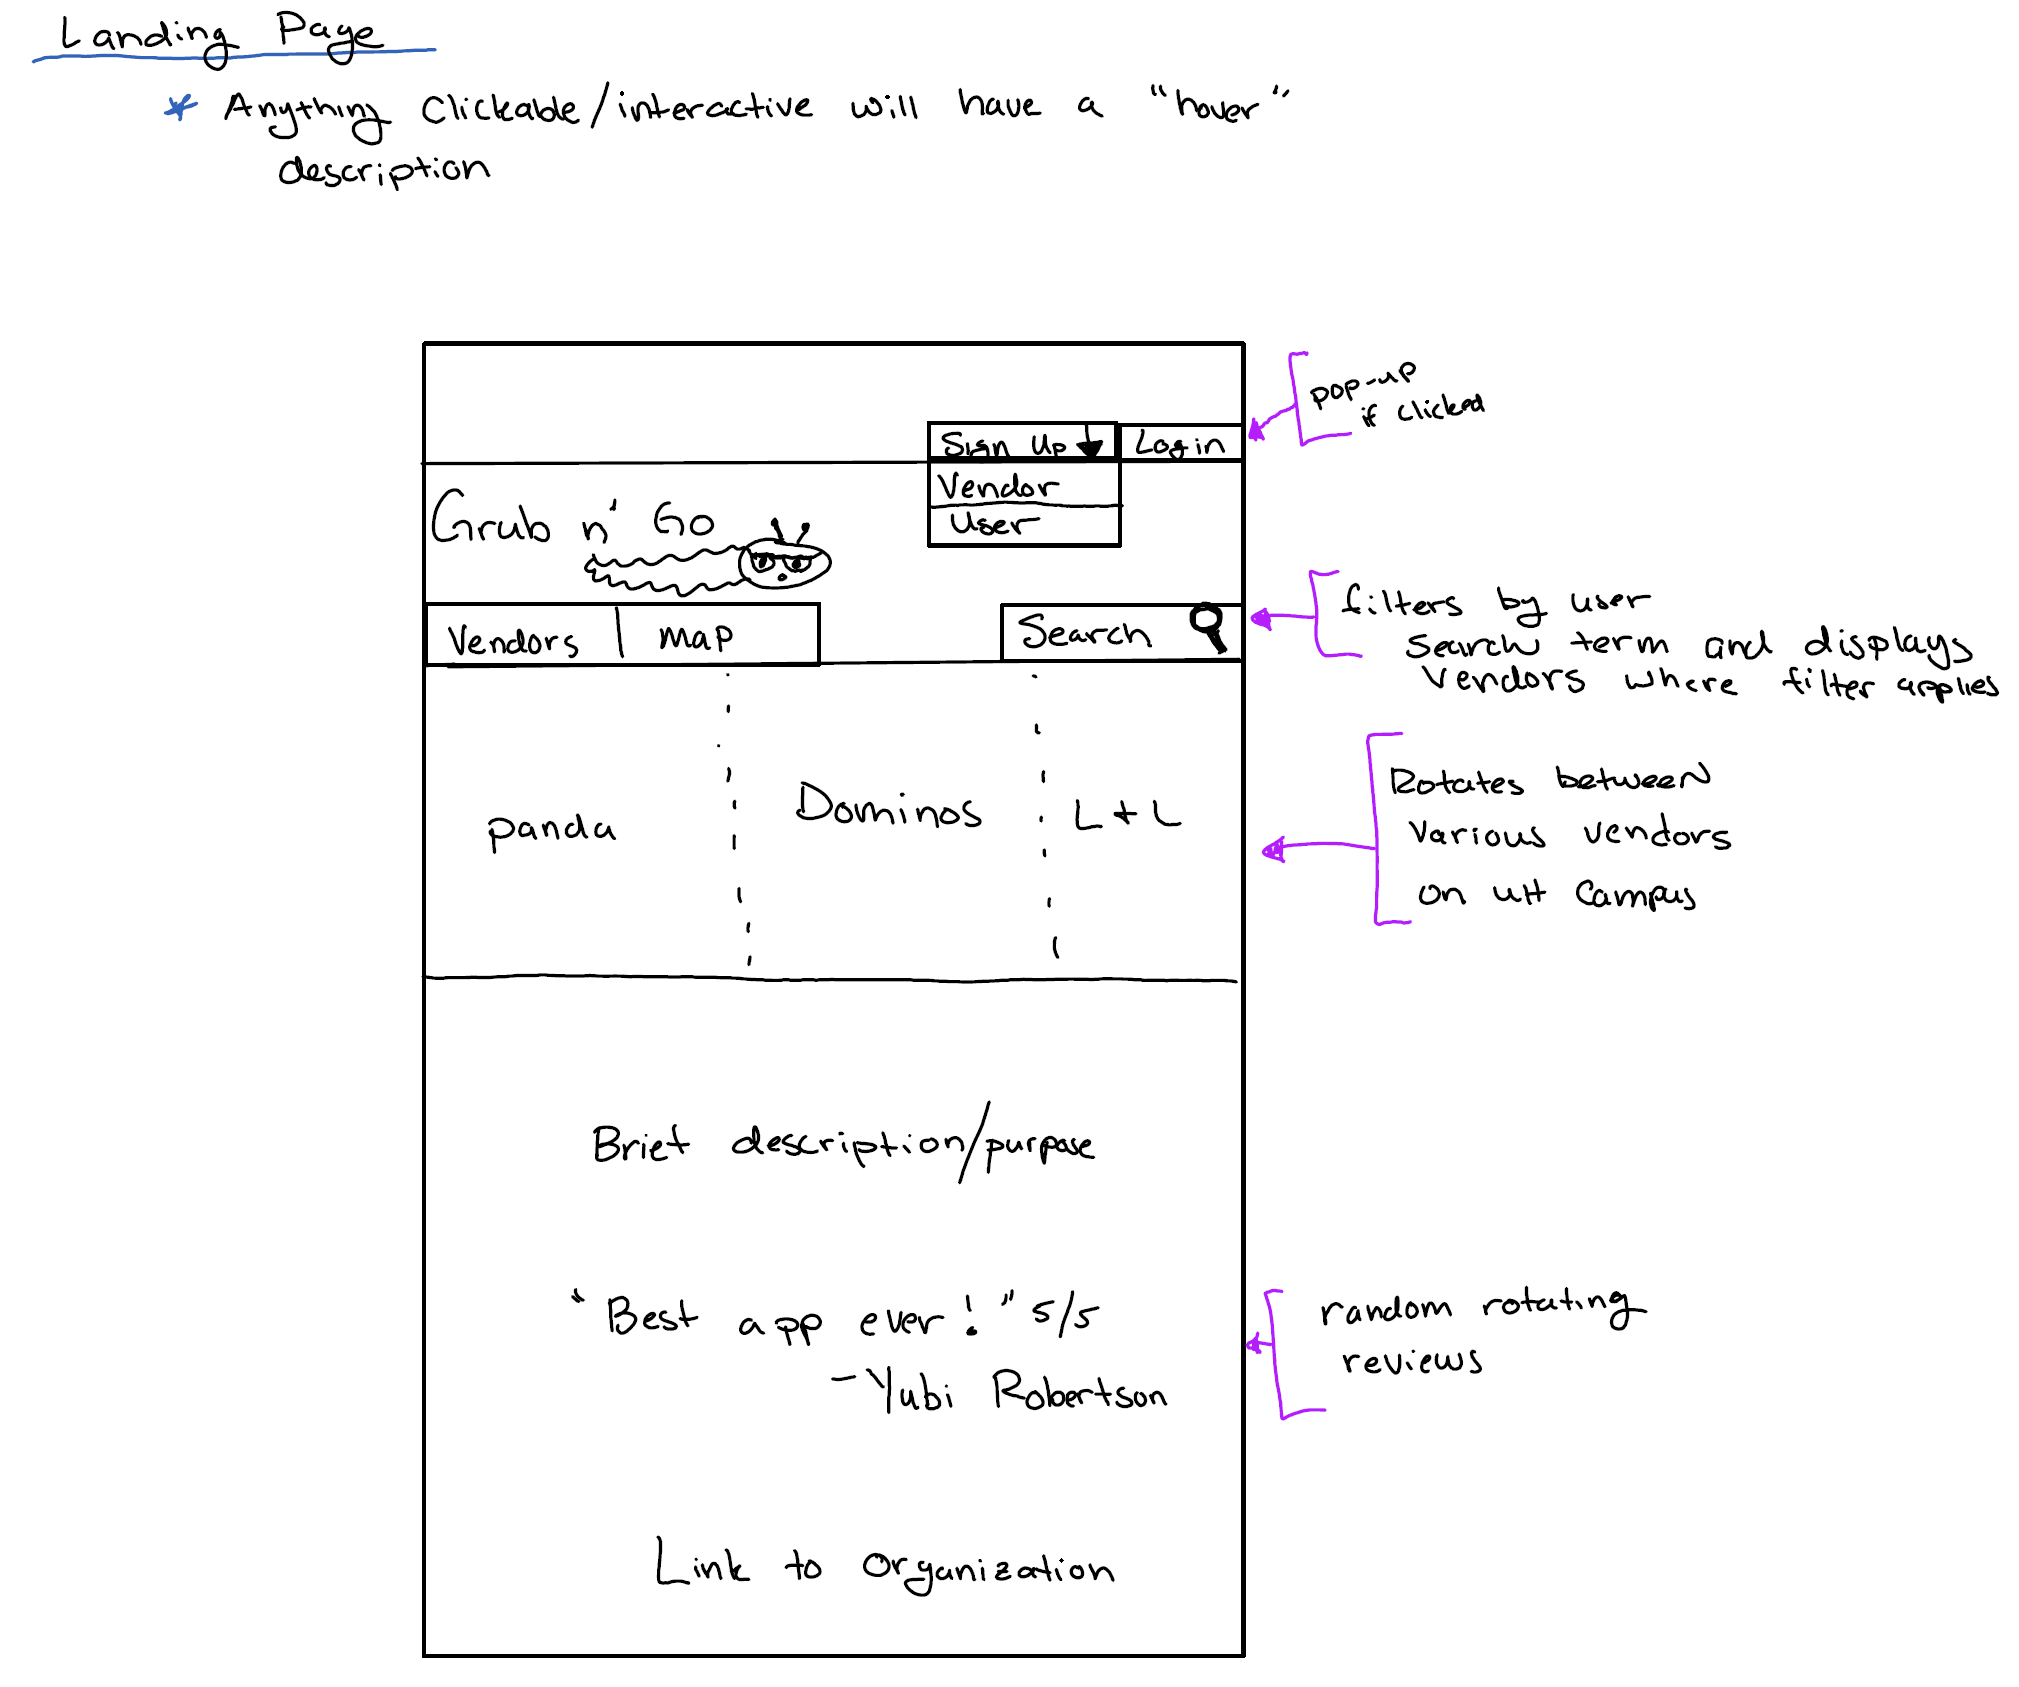
Actual Landing 
Mockup 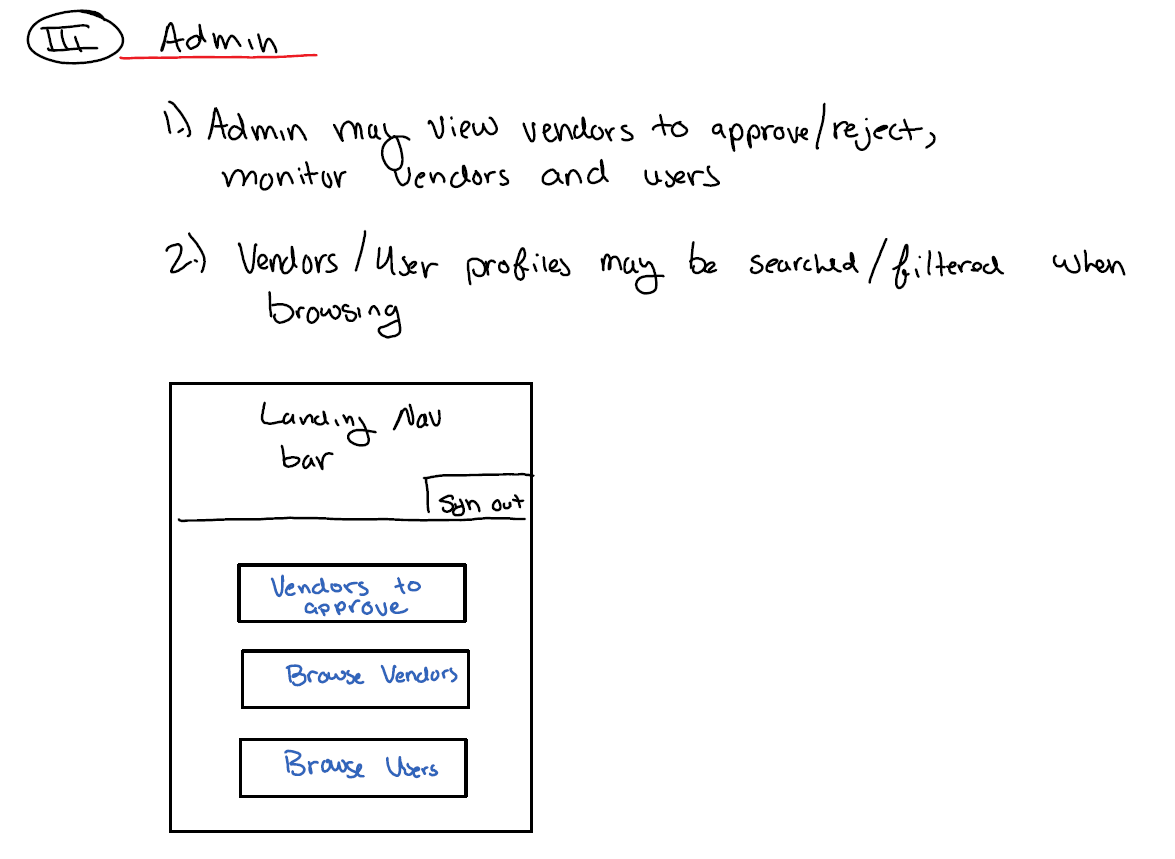
Actual Admin Homepage
Mockup 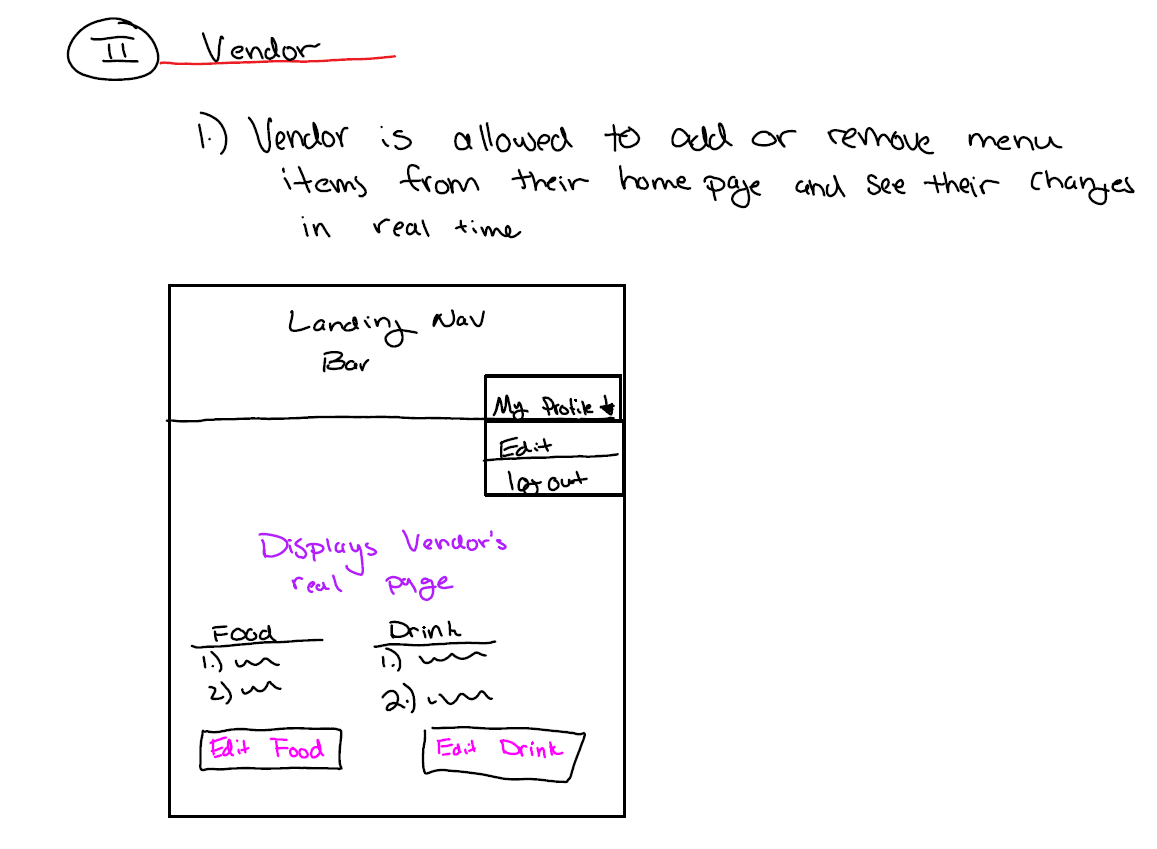
Actual Vendor Homepage
Mockup 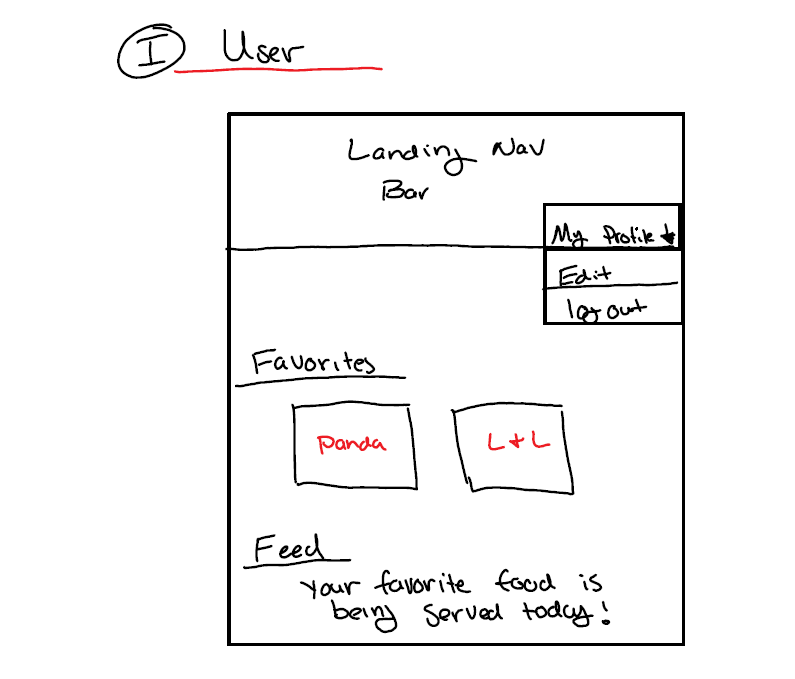
Actual User Homepage
Mockup 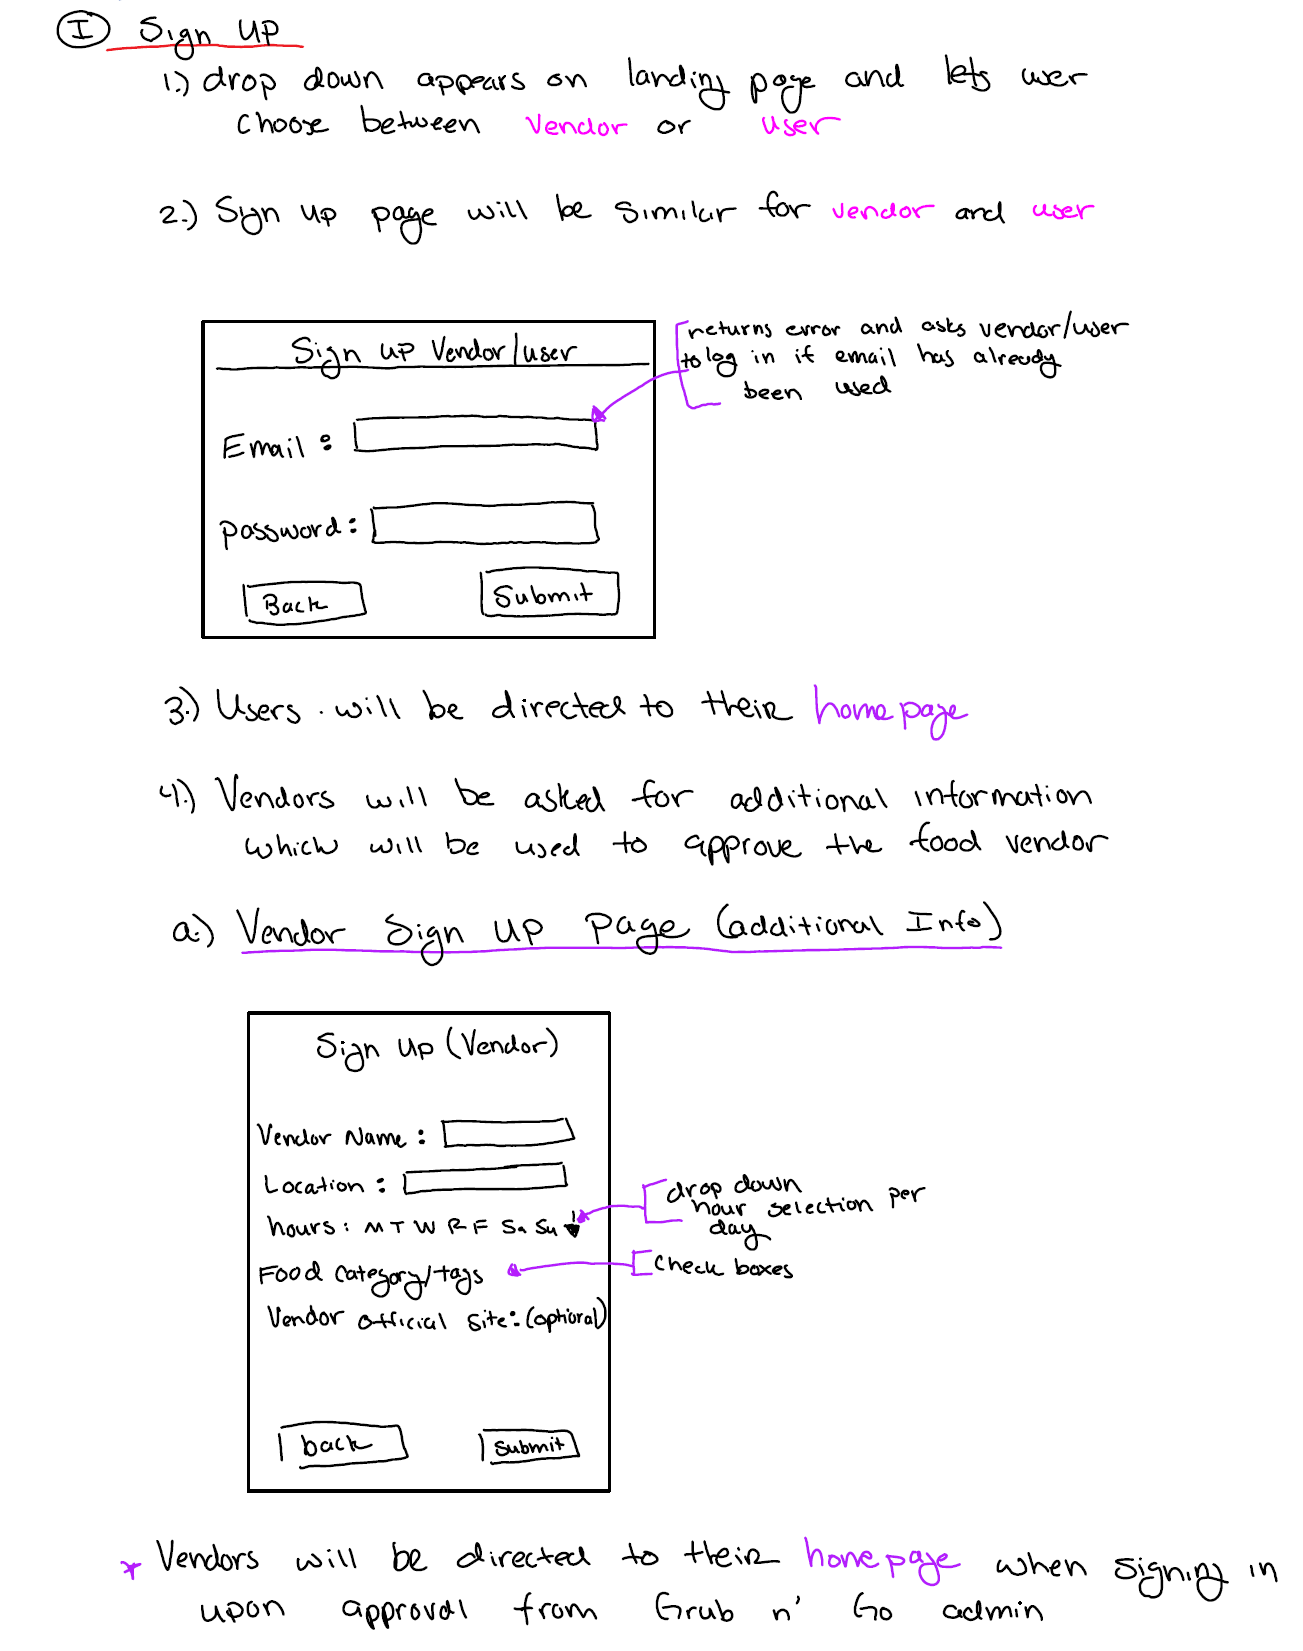
Actual User Login
Mockup 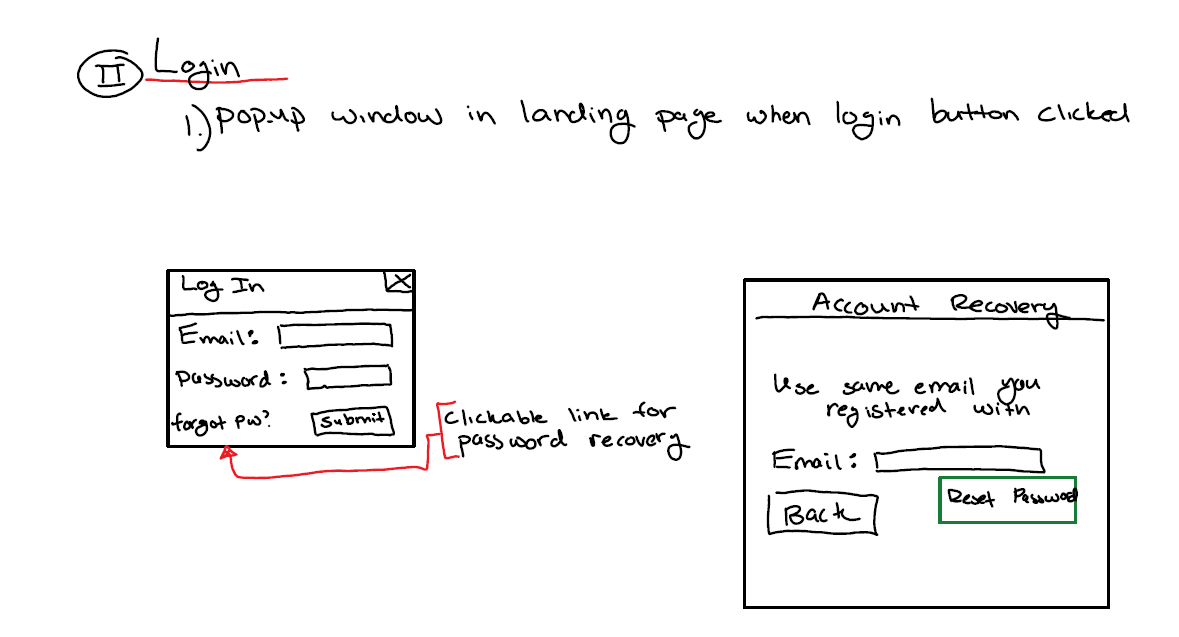
Actual User Login
Mockup 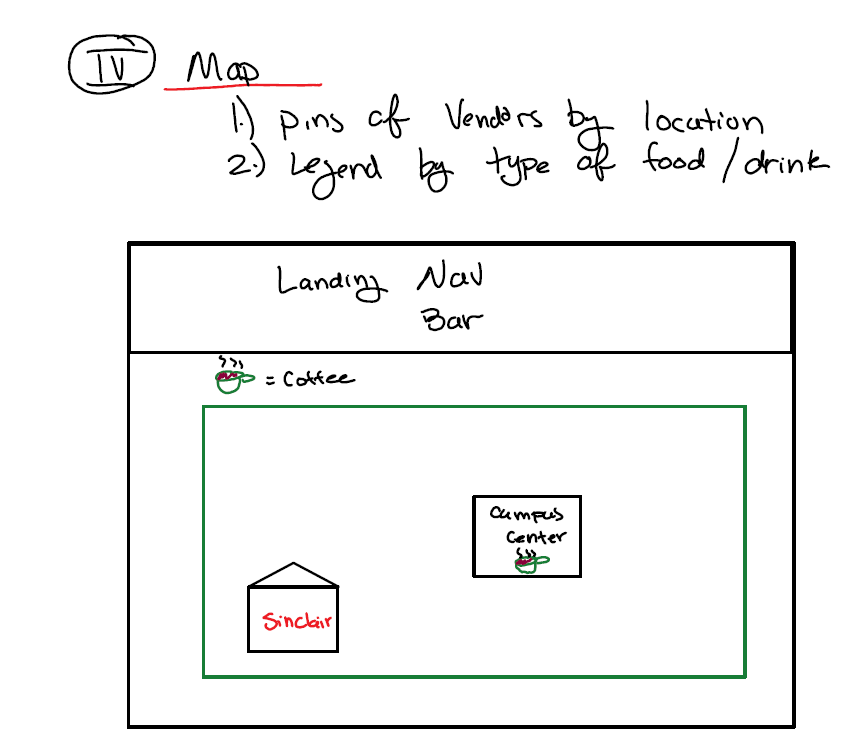
Actual User Login
Milestone 1 was implemented as Grub ‘n’ Go GitHub Milestone M1:
Each issue was implemented in its own branch, and merged into master when completed:
Milestone 2: Data model development
This milestone started on April 13th, 2018 and ended on April 24th, 2018.
The goal of Milestone 2 was to significantly improve the functionality and quality of our application beyond the first M1 and improve our software engineering process beyond M1.
Additionally, we had to find at least 5 UH community members to test our application and give feedback and update our organization’s GitHub page to document the current version of our system.
Milestone 2 consisted of two issues, and progress was managed via the Grub ‘n’ Go GitHub Project M2:
Each issue was implemented in its own branch, and merged into master when completed.
Milestone 3: Final Stretch
This milestone started on April 25th and ended on May 4th, 2018.
The primary purpose of M3 was to significantly improve from M2 and use the constructive feedback from those 5 other UH Community Members to propel our project.
The progress of M3 was managed via Grub ‘n’ Go GitHub Milestone M3:
#Initial User Study For our site we reached out to some friends to test the site.
Final look at Grub N Go page